
Password protecting directories on your web server is one of those things you don’t think about often until you absolutely need it. Recently, a client asked me how to password protect specific directories on their website, and it got me thinking about how htaccess password protection has evolved—and more importantly, what hasn’t changed.
Here’s what I’ve learned: the htaccess file is still one of the easiest ways to add password protection to your website or specific folders. But in 2025, there are some critical security considerations you need to know about before implementing basic authentication. I’m going to walk you through exactly how to set up htaccess password protection, what can go wrong, and when you might want to use a different approach.
Table of contents
Open Table of contents
- Before you start: critical prerequisites
- Why password protect directories?
- Important security considerations
- Setting up the htaccess file
- Creating the htpasswd file
- Uploading and testing
- Troubleshooting common issues
- Best practices for htaccess password protection
- Alternatives to htaccess password protection
- Wrapping up
Before you start: critical prerequisites
This is important, so I’m putting it up front: htaccess password protection only works under specific conditions. I’ve seen too many developers waste hours troubleshooting because they skipped this section.
You must be using Apache
The htaccess file is an Apache-specific configuration file. If your web server runs nginx (which powers a significant portion of modern websites), htaccess files won’t work at all. nginx requires a completely different configuration approach using auth_basic directives in your server configuration file.
To check what web server you’re using, you can often tell by looking at your hosting control panel, or you can create a simple PHP file with <?php phpinfo(); ?> and look for the “Server API” line.
SSL/HTTPS is mandatory
This is non-negotiable in 2025. Basic authentication without SSL sends your username and password as base64-encoded text. This means anyone intercepting the traffic (through a man-in-the-middle attack or simple network sniffing) can easily decode your credentials.
Every major browser now flags HTTP sites as “Not Secure,” and Google has been using HTTPS as a ranking signal for years. If you’re implementing password protection over plain HTTP, you’re essentially leaving your credentials exposed.
Before proceeding with htaccess password protection, verify that:
- Your website has a valid SSL certificate installed
- Your site automatically redirects from HTTP to HTTPS
- The browser shows the padlock icon when accessing your site
AllowOverride must be enabled
Your Apache server configuration needs to allow htaccess files to override directory settings. If AllowOverride is set to None in your Apache configuration, your htaccess file will be completely ignored, and you’ll spend hours wondering why password protection isn’t working.
Most shared hosting providers have AllowOverride enabled by default, but if you’re managing your own server or VPS, you may need to check your Apache configuration.
Why password protect directories?
You might want to password protect your website or specific directories for several reasons:
To prevent search engines from indexing certain pages on your website before you’re ready to launch. Those pages won’t appear in search results even if someone searches for them by name. (Though I’d recommend using robots.txt and meta tags as your primary method for this.)
To protect private information such as staging sites, client portals, or internal documentation from unauthorized access. This creates a simple barrier that keeps casual visitors out.
To restrict access to development environments. When your entire website is under development and only a few team members, QA testers, or stakeholders need access, password protection provides a quick solution.
To create members-only areas where paid users or specific team members can enter a username and password to gain access to a restricted area.
To add an extra security layer to sensitive directories like admin panels, backup files, or configuration directories. While this shouldn’t be your only security measure, it adds another obstacle for potential attackers.
When someone tries to access a password protected directory, their browser will prompt them to enter a username and password. Users who don’t know this information will be denied access to the protected directory.
Important security considerations
Before we get into the step-by-step instructions, let me share what I’ve learned about htaccess security over the years—including where it falls short.
This isn’t the most secure method
htaccess password protection uses HTTP Basic Authentication, which is relatively simple but has limitations. It’s perfectly adequate for:
- Protecting staging sites from public view
- Keeping search engines out during development
- Adding a basic barrier to low-sensitivity content
- Quick temporary protection while you implement something better
However, it’s not appropriate for:
- Protecting highly sensitive data
- Production applications with multiple users
- Situations where you need granular permission controls
- Sites that need audit trails of who accessed what
Passwords are stored as hashes
The htpasswd file stores passwords as cryptographic hashes, not plain text. This is good—if someone gains access to your htpasswd file, they can’t immediately see the passwords. However, weak passwords can still be cracked through brute force attacks.
Always use strong, unique passwords for htaccess authentication. Don’t reuse passwords from other systems.
File placement matters
One mistake I see frequently: placing the htpasswd file in the same directory as the htaccess file, within the web-accessible document root. While Apache blocks direct access to files starting with .ht, there’s always a risk of misconfiguration or vulnerabilities that could expose these files.
The best practice is to store your htpasswd file outside your web-accessible directory entirely. For example, if your website files are in /home/username/public_html/, store your htpasswd file in /home/username/private/.htpasswd.
No built-in brute force protection
Basic authentication doesn’t have rate limiting or account lockout features. Someone could theoretically attempt unlimited password guesses. For high-security applications, consider implementing additional protections like IP whitelisting or using application-level authentication with proper rate limiting.
Setting up the htaccess file
A few key points before we create the htaccess file:
Location determines scope. To password protect a specific directory, place the htaccess file in that directory. To password protect your entire website, place it in your root web folder (usually public_html or www).
Cascading protection. htaccess files apply down the directory structure in a cascading fashion. If you place an htaccess file in a directory called /products, all subdirectories like /products/category/item will also be password protected.
One per directory. There can only be one htaccess file for every directory on your web server. If you already have an htaccess file (many sites do, especially WordPress sites), you’ll add these password protection directives to your existing file rather than creating a new one.
Creating the htaccess file
Open your favorite text editor and create a file named .htaccess (note the leading dot—this makes it a hidden file on Unix systems).
Add the following code:
AuthType Basic
AuthName "Restricted Area - Login Required"
AuthUserFile /home/username/private/.htpasswd
Require valid-user
Let me break down what each line does:
AuthType Basic specifies that we’re using Basic authentication. This is the standard type of authentication for htaccess password protection and is perfectly acceptable for our needs.
AuthName “Restricted Area - Login Required” sets the message that appears in the browser’s authentication prompt. You can customize this to anything you want—I like to make it descriptive so users know what they’re logging into.
AuthUserFile /home/username/private/.htpasswd tells the web server where to find your password file. This is critical to get right. You must use the absolute file path from your server root, not a URL.
To find your absolute path:
- Log into your server via SSH
- Navigate to where you want to store the htpasswd file
- Run the command
pwdto display the full path - Use this exact path in the AuthUserFile directive
Common path examples:
- Shared hosting:
/home/username/private/.htpasswd - cPanel:
/home/username/private/.htpasswd - VPS/dedicated:
/var/www/private/.htpasswd
Require valid-user tells the server that any username and password combination in the htpasswd file is authorized to access this protected directory. This means everyone in your password file can access the protected area.
If you wanted to restrict access to only specific users, you could instead use:
Require user john janeThis would only allow the users “john” and “jane” to access the directory, even if other users exist in the htpasswd file.
Relative path alternative
If you need to use a relative path (though I don’t recommend it), you can reference the htpasswd file location relative to the htaccess file location:
AuthUserFile ../../.htpasswdThe ../.. indicates the file is located two directories above the current location. To point to a file within the same directory, you would use:
AuthUserFile ./.htpasswdHowever, storing the htpasswd file in your web-accessible directories is a security risk I’d avoid.
Creating the htpasswd file
The htpasswd file stores your username and password combinations. Each user gets one line in the file with their username and an encrypted password hash.
Using the htpasswd command (recommended)
The easiest and most secure way to create your htpasswd file is using the htpasswd command-line tool. This tool comes with Apache, but you may need to install it separately on some systems.
Installing htpasswd:
On Debian/Ubuntu systems:
sudo apt-get update
sudo apt-get install apache2-utils
On CentOS/RHEL systems:
sudo yum install httpd-toolsCreating the password file:
To create a new htpasswd file with your first user:
htpasswd -c /home/username/private/.htpasswd firstuserYou’ll be prompted to enter and confirm a password:
New password:
Re-type new password:
Adding password for user firstuser
The -c flag creates a new file. Important: Only use -c when creating the file for the first time. If you use -c again, it will overwrite your existing file and delete all previous users.
Adding additional users:
To add more users to an existing htpasswd file, omit the -c flag:
htpasswd /home/username/private/.htpasswd seconduserCreating multiple users in one command:
You can also specify the password directly in the command (useful for scripts):
htpasswd -b /home/username/private/.htpasswd thirduser their_passwordThe -b flag allows you to include the password in the command. Note that this is less secure if you’re typing it in a shared environment where command history might be visible.
Manual creation (alternative method)
If you don’t have access to the htpasswd command, you can create the htpasswd file manually using an online password generator.
Create a new text file and save it as .htpasswd. The file format is:
username:encrypted_passwordUse a reputable online htpasswd generator to create the encrypted password. Several reliable options exist—search for “htpasswd generator” and use one from a trusted source. I’m intentionally not linking to a specific generator because these services come and go.
Never store plain-text passwords in your htpasswd file. The password must be encrypted using bcrypt, MD5, or another supported algorithm.
For multiple users, add each username and password on a new line:
firstuser:$apr1$abc123$randomencryptedstring
seconduser:$apr1$def456$anotherencryptedstring
thirduser:$apr1$ghi789$yetanotherencryptedstring
Password file permissions
Set appropriate permissions on your htpasswd file to prevent unauthorized access:
chmod 644 /home/username/private/.htpasswdThis allows the web server to read the file while preventing other users on shared hosting from accessing it.
Uploading and testing
Now that you’ve created both the htaccess file and htpasswd file, it’s time to put them in place.
Upload the htpasswd file
Upload your htpasswd file to the location you specified in the AuthUserFile directive. Remember, this should ideally be outside your web-accessible directory structure.
Using FTP, SFTP, or your hosting file manager, place the htpasswd file in the exact location referenced in your htaccess file. Double-check that the path matches exactly—this is the most common source of errors.
Upload the htaccess file
Upload the htaccess file to the directory you want to protect:
- To protect your entire website: Place it in your web root (usually
public_html,www, orhtdocs) - To protect a specific directory: Place it in that specific folder (e.g.,
/public_html/admin/)
Test your password protection
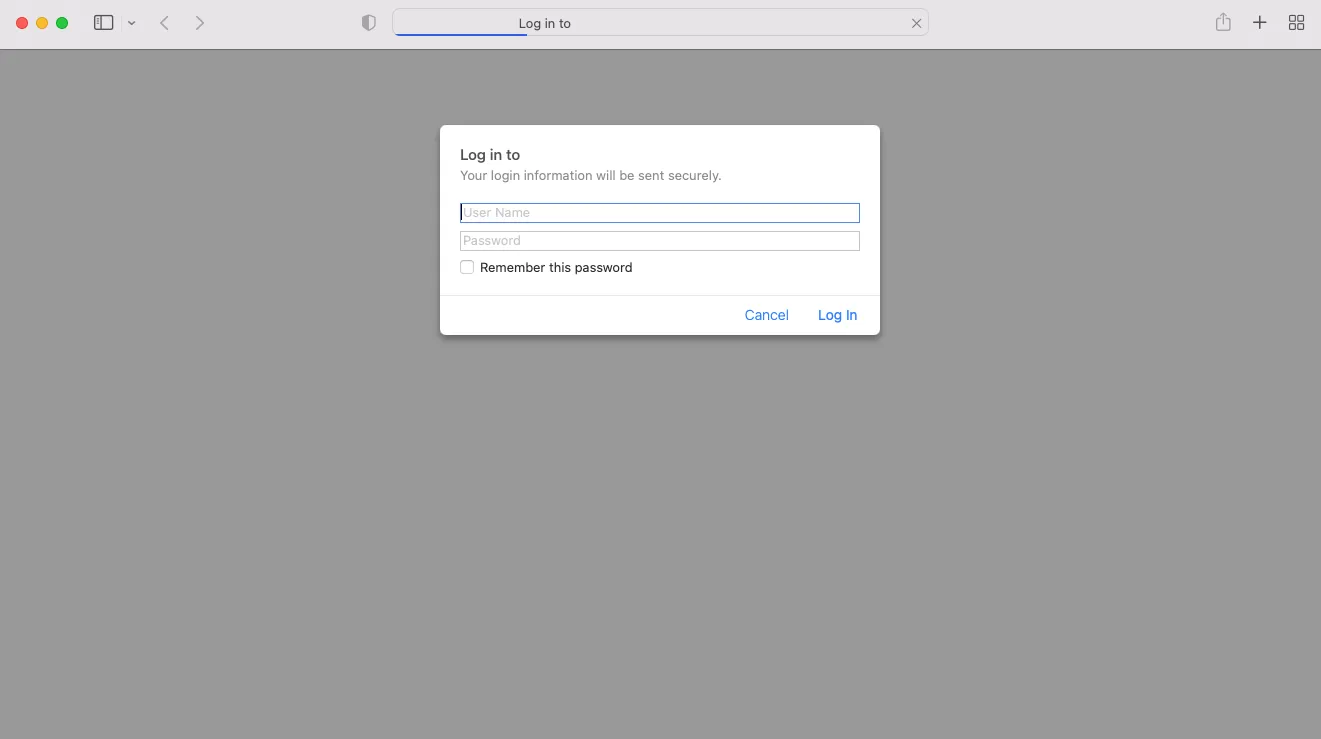
Open your web browser and navigate to the protected directory. You should immediately see a browser authentication prompt asking for a username and password.
Enter the credentials you created in the htpasswd file. If authentication succeeds, you’ll access the directory normally. If authentication fails, you’ll see an error message or be prompted to try again.
What success looks like
When everything is configured correctly:
- Browser displays an authentication dialog box
- The dialog shows your custom AuthName message
- Entering correct credentials grants access
- The browser remembers your credentials for subsequent requests
- Subdirectories are automatically protected
Troubleshooting common issues
Here’s what I’ve learned from years of setting up htaccess password protection—and what to do when things go wrong.
500 internal server error
If you see a 500 error when accessing the protected directory, it usually means there’s a syntax error in your htaccess file or the server can’t process your directives.
Check for:
- Typos in directive names (AuthType, AuthName, etc.)
- Incorrect file paths in AuthUserFile
- Missing quotes around AuthName value
- AllowOverride disabled in Apache configuration
Debugging tip: Check your Apache error logs. On most systems, you can find them at:
- cPanel: Home directory → logs → error_log
- Ubuntu/Debian: /var/log/apache2/error.log
- CentOS/RHEL: /var/log/httpd/error_log
Authentication prompt never appears
If you navigate to the directory but never see a password prompt:
The htaccess file might not be loaded. Check that:
- The file is named exactly
.htaccess(with the leading dot) - The file is in the correct directory
- File permissions allow the web server to read it (should be 644)
- AllowOverride is enabled in your Apache configuration
The path might be wrong. Verify your AuthUserFile path is correct:
# Log in via SSH and check if the file exists
ls -la /home/username/private/.htpasswd
401 authorization required error
If you see a 401 error or the authentication prompt keeps reappearing even with correct credentials:
The htpasswd file might not be found. Double-check:
- The absolute path in AuthUserFile is correct
- The htpasswd file exists at that exact location
- File permissions on htpasswd are readable by the web server
- The username and password were created correctly
Try creating a test user:
htpasswd /home/username/private/.htpasswd testuserThen try logging in with this new account to see if the issue is with your password file location or specific user credentials.
WordPress 404 errors with protected subdirectories
WordPress routing can conflict with password-protected subdirectories. When you try to access a password-protected subdirectory in a WordPress site, you might get a 404 Not Found error instead of the authentication prompt.
The fix: Add an ErrorDocument directive to your htaccess file:
ErrorDocument 401 default
AuthType Basic
AuthName "Protected Area"
AuthUserFile /home/username/private/.htpasswd
Require valid-user
The ErrorDocument 401 default line tells Apache to use its default 401 handler rather than letting WordPress intercept the authentication request.
Password protection not applying to subdirectories
If subdirectories aren’t being protected, check for:
- Separate htaccess files in subdirectories that might be overriding your settings
- Location of your htaccess file (must be in parent directory)
- Permissions issues preventing the htaccess file from being read in subdirectories
Forgotten passwords
If users forget their passwords, you can reset them:
htpasswd /home/username/private/.htpasswd usernameThis prompts you to set a new password for the specified username without affecting other users.
To remove a user entirely:
htpasswd -D /home/username/private/.htpasswd usernameBest practices for htaccess password protection
Based on my experience implementing password protection on dozens of sites, here are the practices that matter most:
Store password files securely
Never place htpasswd files in web-accessible directories. Even though Apache blocks access to .ht* files by default, configurations can change, vulnerabilities can emerge, or backups might expose these files.
Good locations:
/home/username/private/.htpasswd(outside web root)/home/username/secure/.htpasswd(dedicated secure directory)/var/secure/.htpasswd(on VPS/dedicated servers)
Bad locations:
/public_html/.htpasswd(in web root)/public_html/admin/.htpasswd(in protected directory)- Anywhere accessible via URL
Use strong passwords
Basic authentication has no built-in rate limiting, making it vulnerable to brute force attacks if passwords are weak.
Password requirements:
- Minimum 12 characters
- Mix of uppercase and lowercase letters
- Include numbers and symbols
- Don’t reuse passwords from other systems
- Use a password manager to generate and store them
Limit user access
Only create accounts for users who genuinely need access. Each additional username and password combination is another potential security risk.
Periodically review your htpasswd file and remove users who no longer need access:
cat /home/username/private/.htpasswdThis displays all current users. Remove any that shouldn’t be there anymore.
Consider IP whitelisting
For added security, combine password protection with IP address restrictions. This ensures that even if credentials are compromised, access is limited to specific locations.
For Apache 2.4+ (recommended):
AuthType Basic
AuthName "Protected Area"
AuthUserFile /home/username/private/.htpasswd

<RequireAll>
  Require valid-user
  Require ip 203.0.113.0 198.51.100.0
</RequireAll>
For Apache 2.2 (legacy servers):
AuthType Basic
AuthName "Protected Area"
AuthUserFile /home/username/private/.htpasswd
Require valid-user

Order Deny,Allow
Deny from all
Allow from 203.0.113.0
Allow from 198.51.100.0
The Apache 2.4 syntax uses <RequireAll> to specify that both valid credentials AND an allowed IP address are required. Since Apache 2.4 has been standard since 2012, most servers in 2025 use this newer syntax. If you’re on an older server, the legacy syntax will still work.
Monitor access logs
Regularly check your Apache access logs for suspicious activity:
- Multiple failed authentication attempts
- Unusual access patterns
- Requests from unexpected locations
Most hosting control panels provide easy access to these logs, or you can view them directly via SSH.
Document your setup
Keep a record of:
- Where you placed htaccess files
- Location of htpasswd files
- Which directories are protected
- List of authorized users
This documentation is invaluable when troubleshooting or when another team member needs to manage the system.
Alternatives to htaccess password protection
While htaccess password protection is useful, it’s not always the right solution. Here are alternatives to consider:
nginx basic authentication
If you’re running nginx instead of Apache, you can’t use htaccess files. nginx uses a different configuration approach:
location /protected {
    auth_basic "Restricted Area";
    auth_basic_user_file /home/username/private/.htpasswd;
}
This goes in your nginx server configuration file, typically located at /etc/nginx/sites-available/your-site. The htpasswd file format is the same as Apache, so you can still use the htpasswd command to create and manage users.
Note: Unlike htaccess files, nginx configuration changes require root access and a server restart:
sudo nginx -t  # Test configuration
sudo systemctl reload nginx  # Apply changes
Application-level authentication
For production websites with multiple users, consider implementing authentication at the application level:
WordPress: Use plugins like Password Protected, or WordPress’s built-in user system with membership plugins.
PHP Applications: Implement session-based authentication with proper password hashing (bcrypt), rate limiting, and audit logging.
Node.js Applications: Use passport.js or similar authentication middleware with proper session management.
Benefits of application-level authentication:
- Better user experience with custom login forms
- Granular permission controls
- Password reset functionality
- Activity logging and audit trails
- Integration with SSO and OAuth providers
- Rate limiting and brute force protection
Cloud-based authentication services
For modern applications, consider delegating authentication to specialized services:
Options include:
- Auth0 (comprehensive authentication platform)
- Firebase Authentication (Google’s solution)
- AWS Cognito (for AWS-hosted applications)
- Okta (enterprise-focused)
These services handle the complex security aspects of authentication while providing a better user experience.
When to use each method
Use htaccess password protection for:
- Quick temporary protection during development
- Staging sites that need simple access control
- Protecting static files or documentation
- Adding a second authentication layer
- Situations where you don’t control the application code
Use nginx basic authentication for:
- Same use cases as htaccess, but on nginx servers
- Protecting reverse proxy endpoints
- Adding authentication to applications without built-in auth
Use application-level authentication for:
- Production websites and applications
- Multiple user accounts with different permissions
- Situations requiring password reset functionality
- When you need detailed access logging
- Applications that need modern authentication features
Use cloud authentication services for:
- New applications you’re building from scratch
- Apps requiring enterprise features like SSO
- Multi-platform applications (web + mobile)
- When you want to avoid maintaining authentication infrastructure
Wrapping up
htaccess password protection remains a valuable tool in 2025, but it’s important to understand both its capabilities and limitations. The htaccess file provides a quick, straightforward way to password protect directories on Apache servers, making it ideal for development sites, staging environments, and situations where you need basic access control without complex infrastructure.
The key points to remember:
Security requirements have evolved. SSL/HTTPS is mandatory—never implement password protection over plain HTTP. Store your htpasswd file outside web-accessible directories. Use strong, unique passwords for every user.
Know your web server. htaccess only works on Apache. If you’re running nginx or another web server, you’ll need a different approach. Check your server type before spending time on htaccess configuration.
This is basic authentication. It’s called “basic” for a reason. While htaccess password protection is perfectly adequate for many use cases, it lacks features like rate limiting, detailed access logs, and granular permissions. For production applications with sensitive data or multiple users, consider application-level authentication or cloud-based authentication services.
File paths matter. The most common errors I see are related to incorrect AuthUserFile paths. Always use absolute paths from your server root, and verify the file exists at that exact location.
Test thoroughly. After setting up password protection, test it from multiple browsers and devices. Try both correct and incorrect credentials. Verify that subdirectories are protected as expected.
Whether you’re protecting a client’s staging site, keeping Google from indexing pages before launch, or adding a security layer to sensitive directories, htaccess password protection gets the job done. Just make sure you’re using it in the right context, with proper security measures, and on a server that supports it.
For more detailed information about htaccess configuration options, check out Apache’s official documentation on htaccess files.
And if you’re interested in nginx configuration since it doesn’t support htaccess files, nginx’s documentation on auth_basic covers their equivalent authentication method.
Have questions about implementing htaccess password protection on your site? Run into issues I didn’t cover here? Let me know—I’m always learning from the problems people encounter in real-world scenarios.